Hario V60 Conical Dripper
- January 14, 2023
Total Brew Time: 3-4 minutes
The Hario V60 is one of the most popular pour over brewers in the world for good reason. Simple, cost-effective and very easy to use, the V60 has become a staple in the specialty coffee world. When compared to some other brewing methods, the V60’s conical, open-bottom design allows for flexibility in brewing depending on your preferences. We love the complexity and body the V60 demonstrates in our brews using the technique below, and it produces a delicious cup of coffee no matter the style or roast level.
THINGS YOU’LL NEED
- Water kettle
- Digital scale (ideally w/ 0.1g accuracy)
- Timer
- Spoon
- V60 ’02’ dripper & ’02’ sized filter
- Collection vessel
- 500g filtered water
- 30g of coffee (ground medium-fine, see Notes below)
BREWING
- Insert the filter into the top of the V60. Make sure you’re using the right size filter for the size of your brewer, in this case, an ’02’ (1-4 cup) sized filter.
- Place the brewer on top of your collection vessel. Rinse the filter with hot water, then discard water. This removes any paper taste and pre-heats the brewer.
- Place your coffee grounds into the filter and create a small well in the center of the grounds using the spoon or your finger. This helps to evenly saturate all the grounds during the bloom phase.
- Place the brewer + vessel onto your scale and tare/zero scale.
- Ensure water is between 195-205F, or just below boiling depending on your altitude. If brewing with light/medium roasts (like ours), the hotter the better. Darker roasts don’t require the water to be quite as hot to achieve the same amount of extraction.
- Start your timer and pour about 60g of water (2x the weight of your ground coffee) over the grounds to bloom. Pick up the brewer + vessel and gently swirl the coffee/water slurry to make sure the grounds are fully saturated.
- Allow the coffee/water mixture to sit (bloom) for 45 seconds. This allows trapped CO2 to escape, which will improve the extraction of your brew.
- When the timer hits 45 seconds, add more water aiming for 60% of the total brew weight (300g in this case) in the next 30 seconds. In other words, for this recipe your scale should read 300g by 1:15 seconds into your brew. The cone of the brewer should be pretty much full of water, which helps maintain the correct brew temperature.
- If necessary, allow the water to drain a little and then add the remaining water in the next 30 seconds. In other words, for this recipe your scale should read 500g by 1:45 seconds into your brew.
- Using your spoon, stir gently around the outer edge of the water once clockwise and once counter-clockwise to knock off any coffee grounds stuck to the side of the filter.
- Allow the water to drain a bit, then carefully pick up the brewer + vessel and give the coffee/water mixture a gentle swirl. The objective here is to create a nice, flat coffee bed at the bottom of the brew chamber and give you the most even extraction possible.
- Finally, allow the water to drain completely through the coffee/filter. The total brew time should be between 3-4 minutes for this recipe, but this will depend on your water:coffee ratio, filter, and other variables.
- Enjoy!
Some Notes:
- You can adjust the amounts of coffee and water to your specific tastes, but we like a 16.6:1 starting ratio of water to coffee.
- We always recommend grinding your coffee right before you brew. We use the Fellow Ode (Gen 2) grinder, and we typically grind our coffees between 5 and 6 on this grinder when we’re brewing on the V60.
- There are tons of how-to videos out there for brewing coffee with a V60. This recipe is based on James Hoffman’s ‘The Ultimate V60 Technique’ video that you can reference here if you have any questions. A big thanks to James and his team for developing these great, easy to follow recipes backed by tons of data and testing. We highly recommend watching this video before you brew.
Guides
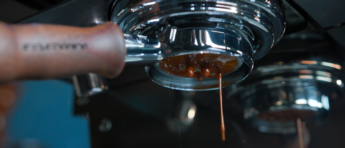
How to Get the Most from Your Home Espresso Machine
If you want to make coffee shop quality espresso at home, then you need to “dial in” your espresso machine every time you use a new coffee. “Dialing in” is…
Keep reading
Guides
Chemex 8-Cup Coffee Maker
Total Brew Time: 5 -6 minutes The Chemex is one of our absolute favorite ways to brew coffee. Designed and first produced in the early 1940s, the Chemex is…
Keep reading